
- Why Sealing Tiles After Refinishing Matters
- Benefits of Sealing Your Tiles
- How to Seal Tiles After Refinishing
- Tips for Maintaining Sealed Tiles
1. Why Sealing Tiles After Refinishing Matters
After refinishing your tile floors, it’s essential to apply a protective sealant. Sealing ensures that the tiles retain their newly refinished appearance while providing an extra layer of protection against wear, stains, and moisture damage. Many homeowners overlook this crucial step, but doing so is vital for maintaining the longevity and beauty of your tiles.
Miracle Method Surface Refinishing / miracle tub refinishing
Santa RosaSonoma CountyCalifornia
3200 Dutton Ave Suite #325, Santa Rosa, CA 95407, USA
What Happens if You Don’t Seal Your Tiles?
While refinishing gives your tiles a fresh look, it doesn't protect them from the elements as well as sealing can. Without a protective layer, tiles are more vulnerable to scratches, stains, and water infiltration, which can degrade their quality over time. A sealed surface helps prevent dirt buildup, moisture penetration, and damage caused by regular foot traffic.

America Refinishing Pros / america refinishing pros
9510 SW 137th Ave, Miami, FL 33186, USA
2. Benefits of Sealing Your Tiles
Sealing your tiles after refinishing brings several benefits that contribute to both the aesthetic appeal and the durability of your floors. Here's why you should seal your refinished tiles:
1. Enhanced Durability
Sealing your tiles helps to reinforce the refinishing layer, making your floors more resistant to scratches and daily wear. It acts as a shield, protecting the surface from external damage and ensuring that the tiles remain in pristine condition for longer.
2. Stain and Moisture Resistance
Tiles are often exposed to liquids like water, coffee, and cleaning products, which can cause stains and damage. A sealed surface provides a protective barrier that prevents moisture from seeping into the tiles, reducing the likelihood of mold growth or discoloration. This makes your floors much easier to clean and maintain over time.
3. Easier Cleaning and Maintenance
Sealed tiles are smoother and less porous, which means that dirt and grime are less likely to stick to the surface. This makes cleaning much easier and less time-consuming. With a sealed surface, you’ll find that wiping down your floors becomes a quick and simple task, keeping your home looking fresh and clean.
4. Preservation of Tile Finish
Sealing helps preserve the glossy finish of newly refinished tiles. Without a sealant, tiles can quickly lose their shine and start to look dull. A proper sealant protects that finish, maintaining the tiles’ visual appeal and extending the life of your refinishing work.
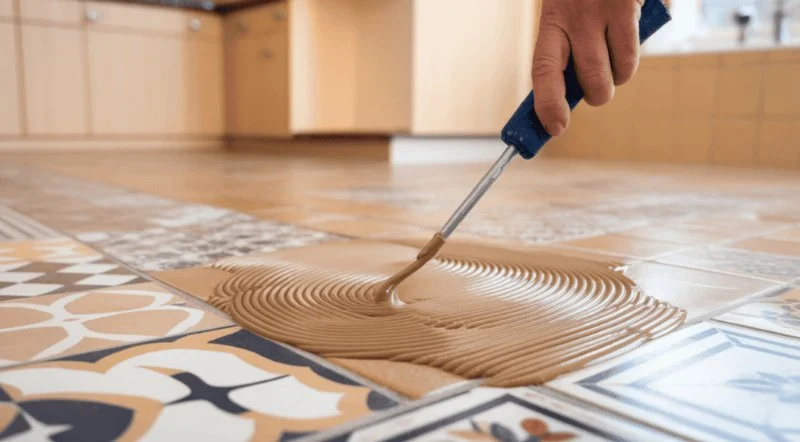
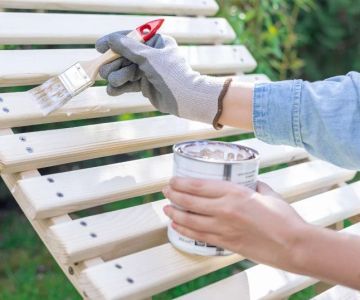
3. How to Seal Tiles After Refinishing
Sealing tiles after refinishing is a straightforward process that can be done with the right tools and materials. Here’s a step-by-step guide to help you seal your tiles effectively:
1. Choose the Right Sealer
There are different types of sealers available, including penetrating sealers, surface sealers, and water-based or solvent-based products. For most refinished tiles, a high-quality acrylic or urethane-based sealer is recommended for its durability and ease of application.
2. Prepare the Surface
Before applying the sealer, ensure that your tiles are completely clean and dry. Sweep or vacuum the floor to remove any dirt or debris, and wipe the tiles with a damp cloth to remove any residual dust. Allow the surface to dry completely before proceeding.
3. Apply the Sealer
Using a clean mop, sponge, or applicator, apply the sealer evenly across the surface of the tiles. Be sure to follow the manufacturer’s instructions for application, including the recommended drying times between coats. Most tiles will require two coats of sealer for maximum protection.
4. Let It Dry and Cure
After applying the final coat of sealer, allow the floor to dry and cure for at least 24-48 hours before walking on it. This ensures that the sealer fully bonds to the tiles and provides optimal protection. During this time, avoid placing heavy furniture or rugs on the floor.
4. Tips for Maintaining Sealed Tiles
Once your tiles are sealed, proper maintenance is key to preserving their longevity and appearance. Here are some tips for keeping your sealed tiles in top condition:
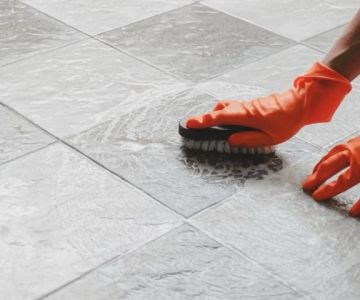
1. Regular Cleaning
Even though sealed tiles are easier to clean, it’s important to clean them regularly to prevent dirt buildup. Use a soft mop or cloth with a mild cleaning solution to wipe the tiles. Avoid harsh chemicals that could degrade the sealer over time.
2. Use Doormats and Rugs
To minimize the amount of dirt and debris that gets on your floor, use doormats and rugs at entryways. This will help protect the tiles from scratches and wear caused by sand, gravel, or other abrasive materials that might be tracked in from outside.
3. Reapply the Sealer as Needed
Over time, the sealer may wear off due to foot traffic, cleaning, or exposure to the elements. It’s important to reapply the sealer every 2-3 years or as recommended by the manufacturer to maintain maximum protection and keep your tiles looking their best.
4. Be Cautious with Heavy Furniture
When moving heavy furniture, always lift it instead of dragging it across the floor. Dragging can scratch the tiles and damage the protective sealer, which can lead to premature wear.
Sealing your tiles after refinishing is one of the best ways to ensure their longevity and maintain their aesthetic appeal. With the right sealant and proper maintenance, your refinished tiles will remain beautiful and protected for many years to come. For the best products and services for your tile care needs, visit Cast Iron Restoration for expert recommendations and high-quality solutions.


 North Shore Kitchen & Bath0.0 (0 reviews)
 Kusiak Construction Inc4.0 (63 reviews)
 Adagio Kitchen and Bath4.0 (12 reviews)
 New Era Woodworks5.0 (8 reviews)
 Kitchen & Bath Center4.0 (23 reviews)
 ED Remodeling & Painting Inc5.0 (45 reviews)
 How to Refurbish a Cast Iron Skillet at Home: A Complete Guide
 Best Products for Cast Iron Restoration Service: Top Tools and Products
 Simple At-Home Techniques for Cast Iron Restoration | Restore Your Cookware
 How to Restore Cast Iron at Home | A Complete Guide for Beginners
 How Long Does Cast Iron Skillet Refinishing Take? Realistic Timeline for Restoration
 What to Avoid When Attempting Cast Iron Refinishing: Common Mistakes to Watch Out For