

- 1-Why Restore Cast Iron?
- 2-Preparing Your Cast Iron Skillet
- 3-Steps to Refinish Your Cast Iron Skillet
- 4-Maintaining Your Cast Iron Skillet
- 5-Common Mistakes to Avoid in Cast Iron Refinishing
1. Why Restore Cast Iron?
Cast iron skillets are known for their durability, heat retention, and versatility in the kitchen. However, over time, they can lose their non-stick surface and develop rust. Whether it's an inherited skillet, a second-hand find, or a cherished family heirloom, restoring your cast iron skillet is an affordable way to bring it back to life.
Refinishing your skillet will not only improve its performance but also extend its lifespan. A well-maintained skillet can last for generations, providing a reliable cooking surface that gets better with use.

Chicago Odorless Bathtub Refinishing / eco tub restoration
3236 W Eastwood Ave, Chicago, IL 60625, USA
2. Preparing Your Cast Iron Skillet
Before diving into the refinishing process, it's essential to prepare your cast iron skillet properly. This step ensures that you’re starting with a clean slate, allowing the new seasoning to bond effectively with the cast iron.

America Refinishing Pros / america refinishing pros
9510 SW 137th Ave, Miami, FL 33186, USA
Step 1: Clean the Skillet
The first step is to thoroughly clean the skillet. You may need to remove old seasoning, rust, and any grease buildup. Here’s how to do it:
- Scrub with Steel Wool: Use steel wool or a stiff brush to scrub off any remaining seasoning and rust. Be gentle to avoid damaging the skillet’s surface.
- Use a Mild Detergent: While most cast iron purists avoid detergent, it can be useful for cleaning off any dirt or grime during the restoration process. Wash your skillet with warm water and mild soap, then dry it thoroughly.
- Optional: Use a Vinegar Soak: For rust that’s difficult to remove, you can soak the skillet in a 50/50 solution of vinegar and water for about an hour to help loosen the rust.
Step 2: Dry the Skillet
After cleaning, it’s crucial to dry the skillet completely. You can dry it by placing it on the stove over low heat for a few minutes or wiping it with a dry towel. Any moisture left on the skillet can cause further rusting.
3. Steps to Refinish Your Cast Iron Skillet
Once your skillet is cleaned and dried, you can begin the refinishing process. The goal is to create a new, non-stick surface by applying a layer of seasoning.
Step 3: Apply a Thin Layer of Oil
The key to proper seasoning is using the right oil and applying a thin, even layer. Popular oils for seasoning include flaxseed oil, vegetable oil, or grapeseed oil. Here’s how to apply it:
- Apply the Oil: Using a paper towel or cloth, rub a thin layer of oil all over the skillet, both inside and out, including the handle. Be sure to remove any excess oil to prevent it from becoming sticky.
- Wipe Away Excess Oil: Wipe the skillet down with a clean towel to ensure a thin, even layer. If there’s too much oil, it will create a sticky surface, which can lead to uneven seasoning.
Step 4: Bake the Skillet
After applying the oil, it’s time to bake the skillet. Preheat your oven to 450°F (230°C) and place the skillet upside down on the middle rack. Place a piece of aluminum foil on the bottom rack to catch any drips.
Bake the skillet for one hour, then turn off the oven and allow the skillet to cool inside. This step helps the oil bond with the cast iron, creating a strong, durable non-stick coating.
Step 5: Repeat the Process
To achieve the best results, repeat the oiling and baking process 3–4 times. This will build up layers of seasoning, ensuring your skillet develops a robust, non-stick surface.
4. Maintaining Your Cast Iron Skillet
Once you’ve successfully refinished your cast iron skillet, proper maintenance is key to keeping it in top condition. Here are some tips for maintaining your skillet:
- Clean After Each Use: Clean your skillet after every use. Avoid soaking it in water, as prolonged exposure to moisture can cause rust. Instead, wipe it clean with a damp cloth or use a stiff brush to remove food debris.
- Reapply Oil Regularly: After cleaning, lightly oil your skillet to maintain the seasoning. A thin layer of oil will help protect the skillet from rust and keep the surface non-stick.
- Store It Properly: Store your skillet in a dry place, preferably with a paper towel inside to absorb any moisture. This prevents rust and helps maintain the seasoning.
5. Common Mistakes to Avoid in Cast Iron Refinishing
Refinishing a cast iron skillet can be a rewarding process, but there are a few common mistakes to watch out for:
- Over-oiling: Applying too much oil can result in a sticky, uneven surface. Always wipe off excess oil to ensure a smooth finish.
- Not Cleaning Thoroughly: If you don’t remove all the rust or old seasoning, the new seasoning won’t bond properly to the skillet. Take time to thoroughly clean and prepare the skillet before starting.
- Skipping Baking Steps: Don’t rush the seasoning process. Be sure to bake the skillet after each layer of oil to allow the seasoning to cure properly.
By following these steps and maintaining your skillet, you can enjoy a beautifully restored cast iron skillet that will last for generations.
For more tips and the best tools for cast iron restoration, visit Cast Iron Restoration, your go-to source for all things cast iron!





 BathArt Refinishing4.0 (164 reviews)
 Under Pressure Property Service Inc4.0 (49 reviews)
 R J's Tub & Tile Refinishing, LLC4.0 (135 reviews)
 handyman0.0 (0 reviews)
 Meetinghouse Builders4.0 (40 reviews)
 A touch glazing Inc5.0 (61 reviews)
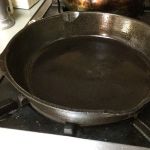 How to Refurbish a Cast Iron Skillet at Home: A Complete Guide
 Best Products for Cast Iron Restoration Service: Top Tools and Products
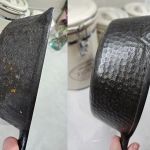 Simple At-Home Techniques for Cast Iron Restoration | Restore Your Cookware
 How to Restore Cast Iron at Home | A Complete Guide for Beginners
 How Long Does Cast Iron Skillet Refinishing Take? Realistic Timeline for Restoration
 What to Avoid When Attempting Cast Iron Refinishing: Common Mistakes to Watch Out For