
1. The Importance of Seasoning a Cast Iron Skillet
Seasoning your cast iron skillet is essential to its performance. Proper seasoning creates a natural non-stick surface that improves with time and use. It also prevents rust and enhances the skillet’s durability. Without proper seasoning, cast iron pans can develop rust, become sticky, or lose their cooking efficiency.
Many cast iron enthusiasts swear by the process, as a well-seasoned skillet can handle high heat, retain heat evenly, and improve over time. However, if you don’t season your skillet properly—or make mistakes during the restoration process—you could be compromising its longevity and performance. In this article, we’ll discuss what not to do when restoring and seasoning a cast iron skillet to ensure you achieve the best results.

Chicago Odorless Bathtub Refinishing / eco tub restoration
3236 W Eastwood Ave, Chicago, IL 60625, USA
2. Common Mistakes to Avoid When Restoring Cast Iron
Restoring and seasoning a cast iron skillet is a relatively simple process, but there are several common mistakes that can hinder the results. By avoiding these errors, you can ensure your cast iron pan stays in top condition for years to come.

Surface Specialists of South Central MN / surface specialists mn
MankatoBlue Earth CountyMinnesota
436 Lyd Blvd, Mankato, MN 56001, USA
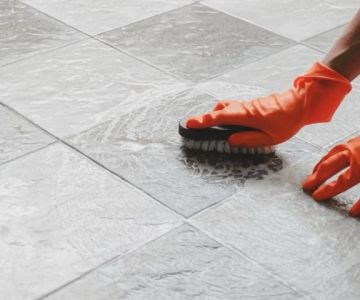
2.1 Overusing Soap
One of the biggest mistakes when restoring cast iron is using too much soap during cleaning. While it's okay to use a small amount of mild soap if necessary, cast iron pans should generally not be scrubbed with soap. Soap can strip away the seasoning layer that forms on the skillet, which is essential for non-stick cooking. Instead, use hot water and a stiff brush to clean your skillet after each use, maintaining the seasoning.
2.2 Applying Too Much Oil
When seasoning your cast iron skillet, it's essential to apply only a thin layer of oil. Over-applying oil can result in a sticky, uneven seasoning layer that can be difficult to fix. The goal is to coat the skillet evenly and lightly—any excess oil should be wiped off before baking the pan. Less is more when it comes to oil in the seasoning process.
2.3 Skipping the Cleaning Process
Before you begin seasoning, it’s crucial to ensure that your cast iron skillet is properly cleaned. Skipping this step can result in poor seasoning adhesion and can affect the overall performance of your skillet. Always remove rust, old seasoning, or debris before starting the process. A thorough cleaning ensures that the seasoning layer will bond to the metal surface effectively.
2.4 Not Drying the Skillet Thoroughly
After cleaning, always dry your cast iron skillet thoroughly before applying oil. If you leave moisture on the pan, it can cause rust to form and negatively impact the seasoning process. Some people make the mistake of not drying the skillet completely, which leads to complications later on. To dry your skillet, either use a towel or place it on a stove burner over low heat for a few minutes to ensure it is completely moisture-free.
2.5 Forgetting to Repeat the Seasoning Process
Another mistake many people make is not repeating the seasoning process enough times. A single round of seasoning may not be enough to create a durable, non-stick surface. For best results, it’s recommended to apply multiple layers of seasoning. Repeat the seasoning process 2-3 times to create a strong, effective coating that will improve with use.
3. Proper Methods for Seasoning Cast Iron Skillets
To ensure the best results when seasoning your cast iron skillet, follow these key steps:
3.1 Choose the Right Oil
Use a high-smoke point oil for seasoning your cast iron skillet. Flaxseed oil is often recommended by cast iron enthusiasts due to its ability to form a durable, hard coating. Other oils like vegetable oil, grapeseed oil, or canola oil can also work well. Avoid using oils with a low smoke point, such as olive oil, as they won’t create a lasting seasoning layer.
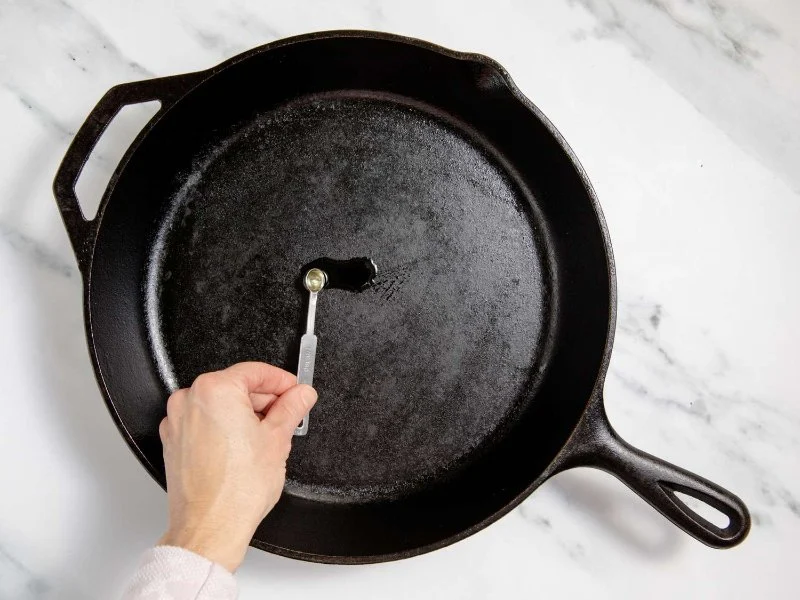
3.2 Apply a Thin Layer of Oil
Once the skillet is dry, apply a thin, even layer of oil to the entire surface of the skillet, both inside and out. Wipe off any excess oil with a paper towel or cloth to avoid pooling, which can lead to uneven seasoning. The thinner the layer, the better the result.
3.3 Bake the Skillet
Place the oiled skillet upside down in an oven preheated to 450°F (232°C). Use aluminum foil or a baking sheet on the rack below to catch any drips of oil. Bake the skillet for one hour, then turn off the oven and let the skillet cool inside. This process allows the oil to bond with the cast iron, creating a smooth, non-stick surface.
3.4 Repeat the Process
For optimal results, repeat the seasoning process 2-3 times. Each layer will build on the previous one, creating a strong, durable seasoning that improves over time.
4. Tools You Need for Restoring Cast Iron
Having the right tools can make the process of restoring and seasoning your cast iron skillet much easier. Here’s what you’ll need:
4.1 Steel Wool or Wire Brush
To remove rust and old seasoning, a stiff wire brush or steel wool is essential. This tool helps you scrub the skillet thoroughly without damaging the metal surface.
4.2 High-Smoke Point Oil
Choose a suitable oil with a high smoke point, such as flaxseed oil, vegetable oil, or canola oil. These oils will help you create a durable seasoning layer.
4.3 Oven or Grill
You’ll need an oven or grill to bake the skillet during the seasoning process. The heat is essential for bonding the oil to the cast iron, so make sure your appliance can reach temperatures of 450°F (232°C).
5. Real-Life Cast Iron Restoration Stories
Many people have successfully restored their cast iron skillets, and their experiences can provide valuable insight. Here are some real-life stories:
5.1 A Restoration Success Story
John inherited an old, rusted cast iron skillet from his grandmother. Initially hesitant about restoring it, he followed the proper steps of cleaning, scrubbing, and seasoning. “The difference was incredible,” John said. “It’s like I have a brand-new skillet that works even better than I imagined. The seasoning process made it non-stick and easy to use, and I’m so glad I took the time to restore it.”
5.2 The Flea Market Find
Sarah bought a rusted but solid cast iron pan at a flea market for just $8. After cleaning and seasoning, the pan became one of her most reliable kitchen tools. “I didn’t realize how simple the process was,” Sarah said. “Now, I use it almost every day, and it’s one of the best purchases I’ve made. Refinishing was totally worth it.”
If you're looking for expert tips and high-quality products for restoring your cast iron cookware, visit Cast Iron Restoration for the best tools and advice to help you get the most out of your pans.


 Biltmore Design Galleria5.0 (43 reviews)
 Best Value Kitchen Refacing & More4.0 (136 reviews)
 Miracle Method of Tulsa Southeast4.0 (40 reviews)
 USA Home Remodeling5.0 (39 reviews)
 Mavaian remodeling Fairfax4.0 (18 reviews)
 Pro One Builders Group4.0 (22 reviews)
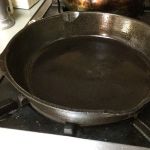 How to Refurbish a Cast Iron Skillet at Home: A Complete Guide
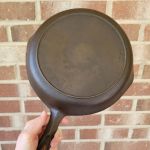 Best Products for Cast Iron Restoration Service: Top Tools and Products
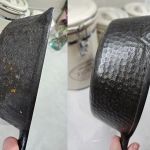 Simple At-Home Techniques for Cast Iron Restoration | Restore Your Cookware
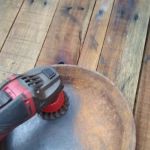 How to Restore Cast Iron at Home | A Complete Guide for Beginners
 How Long Does Cast Iron Skillet Refinishing Take? Realistic Timeline for Restoration
 What to Avoid When Attempting Cast Iron Refinishing: Common Mistakes to Watch Out For