
- 1- Understanding Tile Resurfacing and Regrouting
- 2- Why Resurface and Regrout Your Tiles?
- 3- The Tile Resurfacing Process: Step-by-Step
- 4- The Tile Regrouting Process: Step-by-Step
- 5- Common Mistakes to Avoid in Tile Resurfacing and Regrouting
- 6- Costs and Benefits of Tile Resurfacing and Regrouting
- 7- Case Study: How Tile Resurfacing Transformed a Kitchen
- 8- Final Tips for Successful Tile Resurfacing and Regrouting
1- Understanding Tile Resurfacing and Regrouting
Tile resurfacing and regrouting are effective ways to restore the appearance and functionality of your tiles, particularly in high-traffic areas like kitchens and bathrooms. Both processes involve repairing or refreshing the surface and grout of tiles, but they serve different purposes and are used in different situations.
Tile resurfacing typically involves applying a new layer over existing tiles, which can improve both their appearance and durability. On the other hand, regrouting involves replacing the grout between the tiles, addressing issues like discoloration or damage. These techniques are essential for homeowners who want to refresh their old tiles without the expense of a full replacement.
Miracle Method of Tempe / miracle method of tempe
1635 W University Dr UNIT 126, Tempe, AZ 85281, USA
2- Why Resurface and Regrout Your Tiles?
Over time, tiles can become worn, stained, or cracked due to daily use, exposure to moisture, or natural wear. Rather than tearing out the old tiles and installing new ones, resurfacing and regrouting offer a cost-effective and environmentally friendly alternative. Here are some key reasons to consider these processes:
- Cost savings: Resurfacing and regrouting are generally much cheaper than a full tile replacement, saving you both money and time.
- Improved aesthetics: If your tiles look outdated or damaged, resurfacing can provide a fresh, modern look. Regrouting helps restore the grout lines to their original color, enhancing the overall appearance.
- Increased durability: Resurfacing and regrouting restore the protective layer of tiles, improving their longevity and resistance to stains and water damage.
- Eco-friendly: By resurfacing and regrouting instead of replacing your tiles, you help reduce waste and avoid the environmental impact of demolition and disposal.
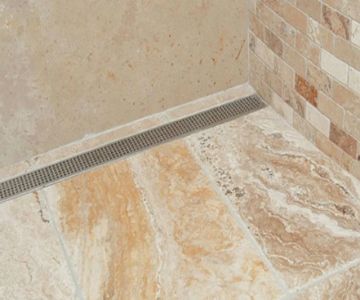
3- The Tile Resurfacing Process: Step-by-Step
Tile resurfacing is a relatively straightforward process, but it requires careful preparation and attention to detail. Here’s a step-by-step guide to resurfacing your tiles:
- Step 1 - Clean the Surface: Before applying a new layer to the tiles, thoroughly clean the surface to remove dirt, grease, and soap scum. Use a cleaning solution specifically designed for tile surfaces.
- Step 2 - Repair Damage: Inspect the tiles for any cracks or chips. Fill in any damaged areas with appropriate filler to ensure the surface is even.
- Step 3 - Apply Bonding Agent: A bonding agent helps the resurfacing material adhere properly to the tiles. Apply a thin layer of bonding agent and allow it to dry according to the manufacturer’s instructions.
- Step 4 - Apply Resurfacing Compound: Once the bonding agent is dry, apply the resurfacing compound using a smooth, even layer. This compound may be acrylic-based or epoxy-based, depending on the tile type and the area being resurfaced.
- Step 5 - Smooth and Finish: Use a smooth tool to ensure an even finish. Allow the resurfacing compound to dry fully, and then apply any additional coats if necessary.
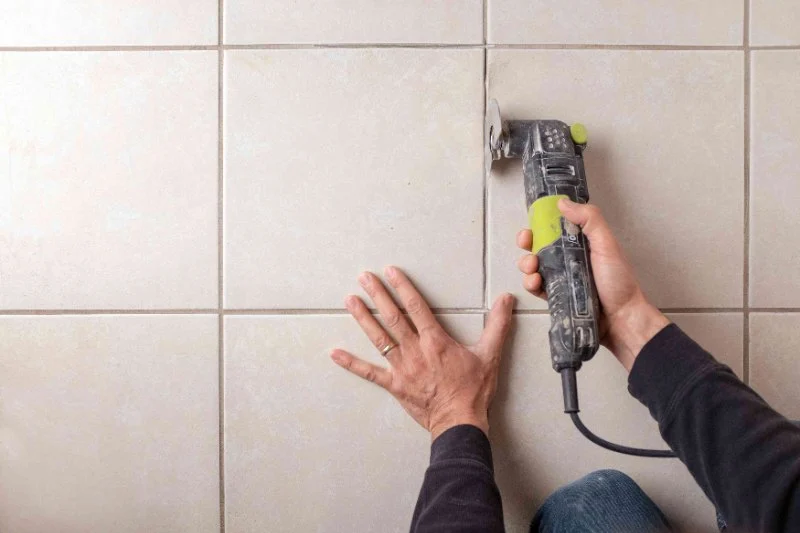
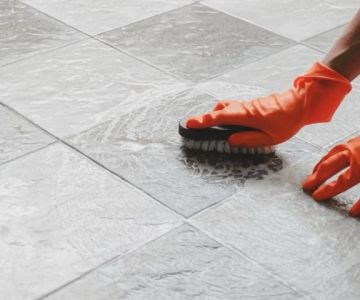
4- The Tile Regrouting Process: Step-by-Step
Regrouting is a simpler process than resurfacing, but it’s equally important for maintaining the integrity and aesthetics of your tiled surfaces. Here’s how to do it properly:
- Step 1 - Remove the Old Grout: Use a grout removal tool or a rotary tool with a grout removal attachment to carefully remove the old grout between the tiles. Be sure to remove all the grout to avoid uneven surfaces when applying new grout.
- Step 2 - Clean the Tile Joints: After removing the old grout, clean the joints thoroughly to remove dust and debris. A small vacuum or a damp cloth can help with this task.
- Step 3 - Apply New Grout: Mix the grout according to the manufacturer’s instructions and apply it using a rubber float. Push the grout into the joints, ensuring the lines are filled completely.
- Step 4 - Clean the Excess Grout: Once the grout has set for a short period, use a damp sponge to wipe away any excess grout from the tile surface. Be careful not to remove grout from the joints.
- Step 5 - Seal the Grout: After the grout has fully cured, apply a grout sealer to protect it from stains and moisture. This will help extend the life of the grout and keep your tiles looking fresh.
5- Common Mistakes to Avoid in Tile Resurfacing and Regrouting
While resurfacing and regrouting are straightforward processes, mistakes can occur if you’re not careful. Here are some common pitfalls to avoid:
- Skipping preparation: Proper cleaning and preparation are essential for the success of both resurfacing and regrouting. Skipping this step can result in uneven surfaces and poor adhesion.
- Incorrect grout color: Be mindful of choosing the right grout color to match your tiles. A contrasting grout color may make the tiles look dated, while a matching color will create a seamless finish.
- Not sealing the grout: Always seal your grout after regrouting to prevent water damage and staining. This step is often overlooked but is crucial for long-lasting results.
6- Costs and Benefits of Tile Resurfacing and Regrouting
The cost of tile resurfacing and regrouting can vary depending on the size of the area, the materials used, and whether you hire a professional or do it yourself. On average, resurfacing costs range from $2 to $5 per square foot, while regrouting typically costs between $1 and $3 per square foot. Hiring a professional may increase these costs, but the results will be more consistent and time-efficient.
The primary benefits of resurfacing and regrouting are cost savings and the ability to extend the life of your tiles without the hassle and expense of a complete replacement. These methods are especially useful for bathrooms, kitchens, and other high-traffic areas that are prone to wear and tear.
Miracle Method Surface Refinishing / miracle refinish tubs
Santa RosaSonoma CountyCalifornia
3200 Dutton Ave Suite #325, Santa Rosa, CA 95407, USA
7- Case Study: How Tile Resurfacing Transformed a Kitchen
Take the example of a family in Michigan who wanted to refresh their outdated kitchen tiles without incurring the cost of a full renovation. The tiles were chipped and the grout was discolored, making the kitchen appear tired and worn out. They decided to try tile resurfacing and regrouting instead of replacing the entire floor.
After resurfacing the tiles with a fresh acrylic coating and regrouting with a matching color, the kitchen looked brand new at a fraction of the cost of replacement. The family was impressed with the durability and improved appearance of their kitchen, proving that resurfacing and regrouting can be a game-changer for home improvement projects.
8- Final Tips for Successful Tile Resurfacing and Regrouting
To ensure a successful tile resurfacing and regrouting project, here are some final tips:
- Be patient: Allow sufficient drying and curing time for the materials you use, whether it’s resurfacing compound or grout.
- Use quality materials: Invest in high-quality resurfacing compounds and grout to ensure long-lasting results.
- Consider professional help: If you're unsure about DIY resurfacing or regrouting, consult a professional to get the best results.
If you’re looking for the right products and services to complete your tile resurfacing and regrouting project, visit Cast Iron Restoration for expert recommendations and supplies.


 One Day Bathtub Refinishers4.0 (10 reviews)
 V&V Tub Refinishing5.0 (1 reviews)
 Ferguson Full Circle3.0 (4 reviews)
 Go Green Demolition & Builders0.0 (0 reviews)
 R & R Refinishing Inc, D/B/A LINE A TUB4.0 (2 reviews)
 Re-Bath4.0 (607 reviews)
 How to Refurbish a Cast Iron Skillet at Home: A Complete Guide
 Best Products for Cast Iron Restoration Service: Top Tools and Products
 Simple At-Home Techniques for Cast Iron Restoration | Restore Your Cookware
 How to Restore Cast Iron at Home | A Complete Guide for Beginners
 How Long Does Cast Iron Skillet Refinishing Take? Realistic Timeline for Restoration
 What to Avoid When Attempting Cast Iron Refinishing: Common Mistakes to Watch Out For