
1-Understanding the Causes of Uneven Tile and Grout
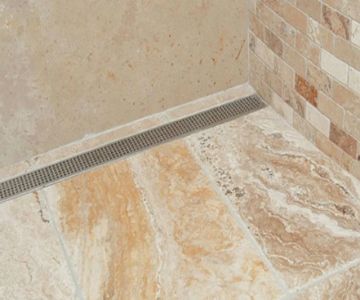
Uneven tile and grout lines are common issues that homeowners face after a remodel, especially when installing new tile floors or backsplashes. These imperfections can occur for a variety of reasons, including improper installation, uneven subfloor, or poor-quality materials. If you’ve noticed that your tiles or grout are uneven after your remodel, don’t worry—this is a fixable problem.
Typically, uneven tiles happen when the substrate (the surface the tiles are being laid on) is not level. Grout lines may appear uneven if the spacing between tiles was inconsistent during installation, or if the grout was applied unevenly. Identifying the underlying cause is key to resolving the issue effectively.
Miracle Method Surface Refinishing / miracle method boulder
Santa RosaSonoma CountyCalifornia
3200 Dutton Ave Suite #325, Santa Rosa, CA 95407, USA
2-Steps to Fix Uneven Tiles After a Remodel
Fixing uneven tiles can be a straightforward process if you take the right approach. Here’s how you can address the problem:
2.1 Assess the Situation
The first step is to inspect the entire tiled area. Check for any obvious gaps or tiles that are noticeably raised or lower than the others. Use a level to measure the height of the tiles to see which ones are uneven. In some cases, it may only be a few tiles that need adjustment, rather than the entire floor or wall.
2.2 Remove the Uneven Tiles
If you have tiles that are significantly uneven, you may need to remove them. To do this, use a tile removal tool to carefully pry up the tiles without damaging the surrounding ones. If the adhesive beneath the tiles is still intact, you can reuse it for the new tiles. However, if the adhesive is too damaged, it will need to be replaced.
2.3 Reinstall New Tiles
Once the uneven tiles have been removed, apply a fresh layer of tile adhesive to the floor or wall. Be sure to use a notched trowel to spread the adhesive evenly. Place the new tiles carefully, ensuring they are level with the surrounding tiles. Use spacers to maintain consistent gaps between the tiles. Let the adhesive set according to the manufacturer’s instructions before proceeding.
3-How to Fix Uneven Grout After a Remodel
Uneven grout lines can be an eyesore, but they are relatively easy to fix. Here’s a simple guide to help you fix grout that has been applied unevenly:
3.1 Remove Excess Grout
If the grout lines are too thick or uneven, you may need to remove some excess grout. Use a grout removal tool or a utility knife to carefully scrape away the excess grout. Be careful not to damage the surrounding tile edges during this process.
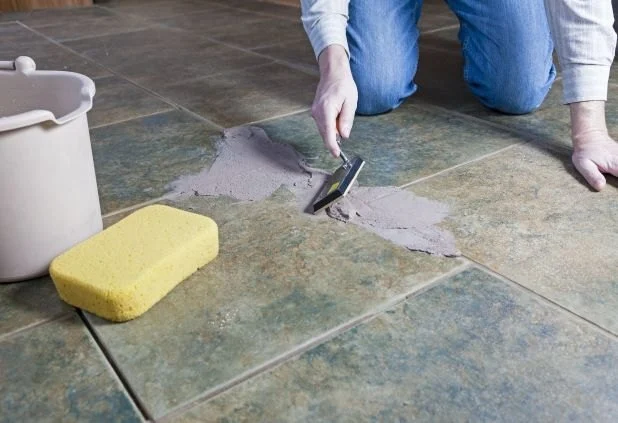
3.2 Apply New Grout
Once the excess grout is removed, mix a small batch of new grout. Using a rubber float, apply the grout into the grout lines, working it in with a diagonal motion. Be sure to press the grout into the gaps to avoid any air bubbles. Wipe away any excess grout with a damp sponge, making sure the grout lines remain smooth and even.
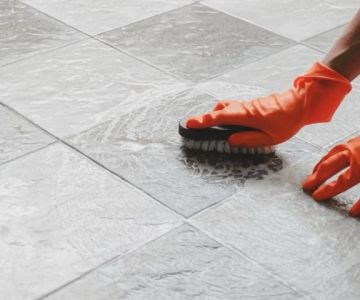
3.3 Clean and Polish the Grout
After the grout has set (usually within 24 hours), clean the tiles and grout lines with a soft cloth. If necessary, polish the grout lines using a grout brush to remove any residual haze. You can also apply a grout sealer to protect it from future stains and moisture damage.
4-Tips for Preventing Uneven Tile and Grout Issues
While it’s possible to fix uneven tiles and grout, prevention is always better than cure. Here are some tips to help prevent these issues during your next remodel:
4.1 Ensure a Level Subfloor or Wall
Before starting your tile installation, make sure the subfloor or wall is level. This will ensure that the tiles are laid evenly from the start. If necessary, use a self-leveling compound to correct any unevenness in the surface.
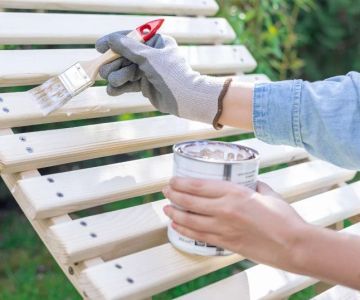
4.2 Use High-Quality Materials
Investing in high-quality tiles, adhesives, and grout will ensure that your project lasts longer and looks better. Low-quality materials may not adhere properly or may cause uneven grout lines after drying.
4.3 Hire a Professional Installer
If you’re unsure about your ability to install tiles or grout properly, consider hiring a professional installer. A skilled installer will ensure that the tiles are laid evenly, and the grout is applied smoothly, preventing future problems.
5-Real Case Study: Fixing Uneven Tile and Grout After a Remodel
Let’s take a look at the case of John, a homeowner who recently remodeled his bathroom. After installing new tile flooring, he noticed that some tiles were uneven, and the grout lines were inconsistent. John decided to take on the task of fixing the problem himself.
He began by carefully removing the uneven tiles and applying fresh adhesive. John then reinstalled the new tiles, ensuring that each one was level with the others. After dealing with the uneven grout lines by removing excess grout and applying new grout, John was able to achieve a smooth, even surface that looked professionally done.
By following these steps and taking his time, John was able to restore his bathroom floor to its original beauty. This case study highlights the importance of attention to detail during a remodel and the satisfaction of fixing issues yourself.
If you’re experiencing tile or grout problems in your home, or if you’re planning a remodel, be sure to visit Cast Iron Restoration for expert advice and the best products to make your project a success.


 K&D Contractors Inc5.0 (62 reviews)
 BRILLIANT RENOVATION LLC5.0 (134 reviews)
 Renew your Tub Refinishing5.0 (6 reviews)
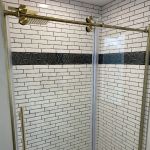 Aros Remodeling LLC5.0 (2 reviews)
 Skill Basement Remodeling Company5.0 (22 reviews)
 New Leaf Remodeling4.0 (48 reviews)
 How to Refurbish a Cast Iron Skillet at Home: A Complete Guide
 Best Products for Cast Iron Restoration Service: Top Tools and Products
 Simple At-Home Techniques for Cast Iron Restoration | Restore Your Cookware
 How to Restore Cast Iron at Home | A Complete Guide for Beginners
 How Long Does Cast Iron Skillet Refinishing Take? Realistic Timeline for Restoration
 What to Avoid When Attempting Cast Iron Refinishing: Common Mistakes to Watch Out For