
1. Introduction: Why the Condition of Your Bathroom Subfloor Matters
The bathroom subfloor is one of the most important structural components of your bathroom. It serves as the foundation for your flooring, ensuring stability and preventing water damage from seeping into the lower levels of your home. Over time, bathroom subfloors can suffer from wear and tear, moisture damage, and other issues that compromise their integrity.
Understanding how to assess your bathroom subfloor is crucial. This guide will walk you through the process of identifying signs that your bathroom subfloor may need replacement, and provide tips for inspection and repair.

Fort Worth Refinishing / fort worth bathtub refinishing
2627 S Cooper St Suite E12, Arlington, TX 76015, USA
2. Common Signs Your Bathroom Subfloor Needs Replacement
Recognizing when your bathroom subfloor needs attention can save you from costly damage and repairs down the road. Here are some common signs of subfloor issues that might require replacement:
- Soft or Squishy Flooring: If the flooring feels soft or spongy underfoot, especially around areas where water tends to accumulate (like near the shower or tub), it’s a strong indicator that the subfloor beneath has suffered water damage or deterioration.
- Water Stains or Mold: Visible water stains or mold on your bathroom floor or walls can signal water infiltration. These stains are often signs of subfloor rot or damage from prolonged exposure to moisture.
- Uneven Flooring: If your bathroom floor appears uneven or slanted, it could indicate that the subfloor has warped due to water damage or shifting.
- Odors: A musty smell in the bathroom can be a sign of mold or mildew growth, which often originates from a damaged subfloor that has been exposed to moisture for too long.
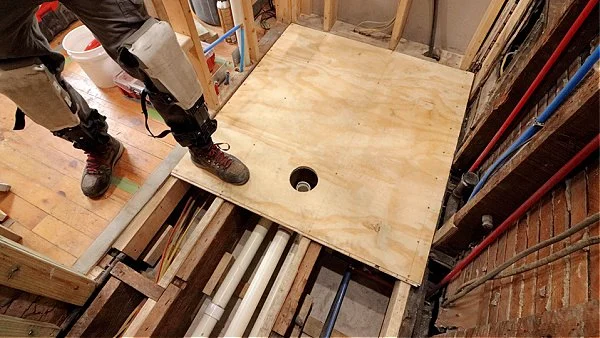
3. How to Inspect Your Bathroom Subfloor
Inspecting your bathroom subfloor doesn’t require specialized tools, but it does require attention to detail. Here are some steps you can take to determine if your subfloor needs replacement:
- Visual Inspection: Start by visually inspecting the floor. Look for visible signs of water damage, such as discoloration, bubbling of the floor covering, or water stains. Also, check the edges of the floor around the bathtub, shower, and toilet for signs of deterioration.
- Tap the Floor: Gently tap on different areas of the bathroom floor with a small hammer or mallet. If you hear a hollow sound or if the floor feels soft under pressure, the subfloor beneath could be rotting.
- Check for Movement: Stand on different sections of the bathroom floor and apply pressure to see if it gives way or moves. Any noticeable flexing or squishiness indicates subfloor damage.
- Remove Floor Coverings: If you’re comfortable, you may want to remove a section of the flooring to inspect the subfloor directly. This will give you a clear view of any damage or rot beneath the surface.
4. Dealing with Damaged Subfloor: Repair vs Replacement
Once you’ve determined that your bathroom subfloor is damaged, the next step is deciding whether to repair or replace it. Here are some factors to consider:
- Extent of Damage: If the subfloor damage is isolated to a small section, a repair may be sufficient. However, if the damage is widespread or the subfloor is severely weakened, replacement is the better option.
- Cost: Replacing a subfloor can be expensive, especially if the damage is extensive. However, neglecting to replace a compromised subfloor can lead to more severe damage, such as mold growth or structural problems that could cost even more to fix in the future.
- Long-Term Durability: A new subfloor will provide a stronger and more durable foundation for your bathroom flooring, ensuring that it will last for many years to come. In the case of minor damage, a repair might only be a short-term fix.
5. Case Study: Bathroom Subfloor Replacement
One homeowner in Florida discovered that their bathroom floor had become soft and uneven, with noticeable water stains along the edges. After inspecting the floor, they found that the subfloor had been compromised by years of water exposure. Instead of attempting a temporary fix, they opted for a complete subfloor replacement, which included replacing the damaged wood and ensuring that the new flooring would be adequately sealed to prevent future moisture damage.
This proactive approach not only improved the look and feel of their bathroom but also prevented more serious structural damage that could have occurred if the issue had been left unaddressed.

Surface Specialists of South Central MN / surface specialists mn
MankatoBlue Earth CountyMinnesota
436 Lyd Blvd, Mankato, MN 56001, USA
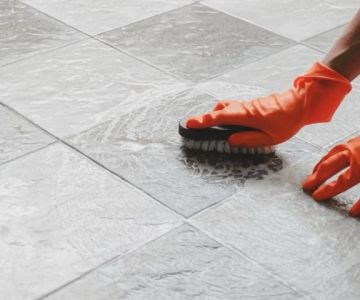
6. Preventing Future Bathroom Subfloor Damage
Once your subfloor is replaced or repaired, taking steps to prevent future water damage is essential. Here are some preventative measures:
- Proper Ventilation: Ensure that your bathroom has adequate ventilation, especially if it has a shower or bathtub. Use an exhaust fan to reduce moisture buildup and prevent water from settling on the floor.
- Regular Maintenance: Check for leaks or water pooling regularly. Repair leaks around the tub, shower, or sink as soon as you notice them to prevent water from seeping into the subfloor.
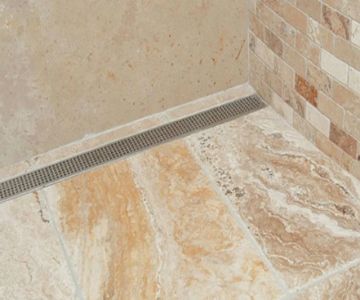
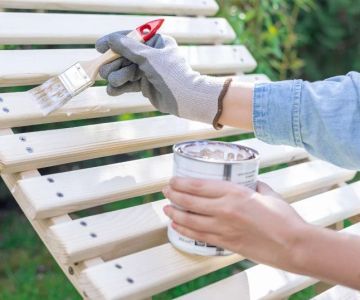
- Waterproofing: Consider applying a waterproof barrier between the subfloor and the flooring material to protect against water damage in high-moisture areas.
7. Conclusion: Ensure Your Bathroom Subfloor Is in Good Condition
Knowing how to assess and address subfloor issues in your bathroom is essential for maintaining the integrity and safety of your home. Regular inspections and early intervention can save you time and money by preventing more significant damage down the road. If you need help replacing or repairing your bathroom subfloor, visit Cast Iron Restoration for expert advice and services to ensure your bathroom is in top shape.


 DoAll Home Improvements LLC5.0 (30 reviews)
 Genstone Construction4.0 (27 reviews)
 BDS Design Build Remodel4.0 (32 reviews)
 T-L CERAMIC INSTALLATION LLC5.0 (3 reviews)
 NuFinishPro of Mission Valley5.0 (42 reviews)
 ReNew Home Remodeling5.0 (20 reviews)
 How to Refurbish a Cast Iron Skillet at Home: A Complete Guide
 Best Products for Cast Iron Restoration Service: Top Tools and Products
 Simple At-Home Techniques for Cast Iron Restoration | Restore Your Cookware
 How to Restore Cast Iron at Home | A Complete Guide for Beginners
 How Long Does Cast Iron Skillet Refinishing Take? Realistic Timeline for Restoration
 What to Avoid When Attempting Cast Iron Refinishing: Common Mistakes to Watch Out For