
The Importance of Waterproof Paint for Bathroom Ceilings
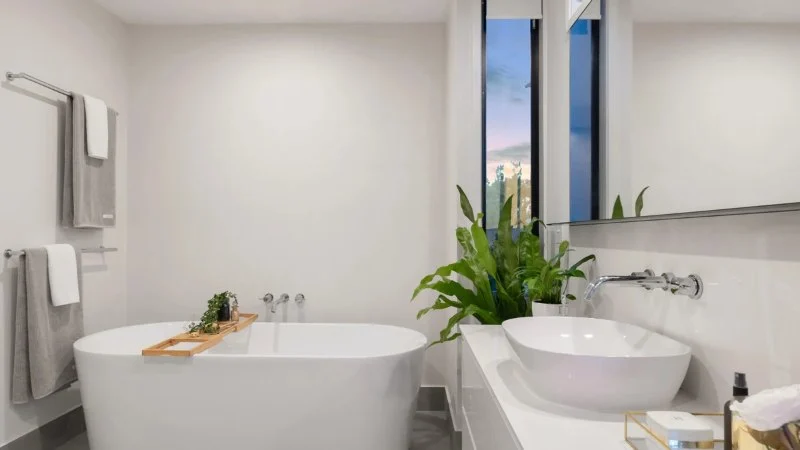
Bathrooms are often subjected to high levels of moisture and humidity, which can lead to water damage and mold growth, especially on ceilings. This makes it crucial to use waterproof paint on bathroom ceilings. Waterproof paint creates a protective barrier that prevents moisture from seeping into the ceiling, safeguarding against damage and keeping your bathroom fresh and clean.
Miracle Method of Tempe / miracle method of tempe
1635 W University Dr UNIT 126, Tempe, AZ 85281, USA
Why Waterproof Paint Is Necessary
Unlike regular paints, waterproof paint is specifically designed to resist the absorption of moisture. This is particularly important in bathrooms, where steam from hot showers or baths can cause regular paints to deteriorate quickly. Waterproof paint helps protect the ceiling from potential damage, such as peeling paint, mold growth, and mildew. It's a simple but effective way to preserve the longevity of your bathroom ceiling while maintaining a clean and safe environment.
Miracle Method Surface Refinishing / miracle tub refinishing
Santa RosaSonoma CountyCalifornia
3200 Dutton Ave Suite #325, Santa Rosa, CA 95407, USA
The Risks of Not Using Waterproof Paint
Failing to use waterproof paint on your bathroom ceiling can lead to several issues, many of which can be costly to fix. Here are some of the risks:
1. Mold and Mildew Growth
One of the biggest risks of not using waterproof paint is the growth of mold and mildew. The damp environment in bathrooms, combined with moisture buildup on ceilings, creates an ideal breeding ground for mold. Mold not only damages your ceiling but can also pose health risks, especially for people with respiratory issues.
2. Peeling and Cracked Paint
Regular paint tends to peel and crack when exposed to high humidity levels over time. This can leave your bathroom ceiling looking unsightly and unkempt. Waterproof paint, on the other hand, is designed to withstand moisture, preventing the paint from peeling or cracking, which helps maintain the aesthetics of your bathroom.
3. Water Damage
If moisture is able to penetrate the paint on your ceiling, it can cause serious water damage. Over time, this damage may affect the underlying structure, leading to more expensive repairs. Waterproof paint serves as a barrier that helps protect your ceiling from water damage and extends the life of the materials beneath.
Choosing the Right Waterproof Paint
When selecting waterproof paint for your bathroom ceiling, it’s important to choose a product that is designed specifically for high-humidity environments. Not all paints are made to withstand the moisture levels typically found in bathrooms. Here’s what to look for:
1. Mold and Mildew Resistance
Look for waterproof paints that contain mold and mildew-resistant properties. These paints are formulated with anti-fungal additives that prevent mold growth on your bathroom ceiling, ensuring your space stays healthy and hygienic.
2. Durability and Longevity
Choose a waterproof paint that is durable and long-lasting. Paints with high-performance ratings can withstand the wear and tear of bathroom use, including exposure to moisture, steam, and cleaning chemicals. This ensures that your ceiling remains intact and looks fresh for years to come.
3. Easy Application and Cleaning
Ensure that the paint you choose is easy to apply and clean. Some waterproof paints are formulated for easy application with minimal prep work, which can save you time and effort. Additionally, choose paints that are washable, allowing you to easily clean any dirt or stains that may accumulate over time.
How to Apply Waterproof Paint to Your Ceiling
Applying waterproof paint to your bathroom ceiling requires some preparation to ensure a smooth and long-lasting finish. Here’s a step-by-step guide to help you:
1. Prepare the Surface
Start by cleaning the ceiling thoroughly. Remove any dust, grime, or old peeling paint. If there’s any mold or mildew, use a mold remover to eliminate it before painting. Repair any cracks or holes in the ceiling to ensure a smooth surface for painting.
2. Prime the Ceiling
It’s important to use a primer designed for high-humidity areas. A good primer helps the waterproof paint adhere to the surface and ensures better coverage. Apply the primer evenly and let it dry according to the manufacturer’s instructions.
3. Apply the Waterproof Paint
Once the primer is dry, it’s time to apply the waterproof paint. Use a roller or brush to apply an even coat of paint to the ceiling. Start from one corner and work your way across the room. Apply additional coats if necessary, following the drying times between each coat.
4. Allow Proper Drying Time
Let the paint dry completely before using the bathroom. This ensures that the waterproof layer has set properly and will perform at its best. Follow the manufacturer’s recommended drying time for the best results.
Real-Life Case: Waterproofing a Bathroom Ceiling
Take the case of Tom and Sarah, a couple who recently renovated their bathroom. After years of dealing with mold and peeling paint, they decided to apply waterproof paint to their bathroom ceiling. They followed the steps above, using a mold-resistant primer and high-quality waterproof paint. The result? A clean, bright ceiling that not only looks great but also stays free of mold and mildew, even in their high-humidity bathroom. They were able to avoid costly repairs and continue to enjoy their beautifully maintained bathroom.


 Floor and Bath Solutions4.0 (30 reviews)
 Premier Renovation0.0 (0 reviews)
 Calibrated Surfaces, Inc.4.0 (20 reviews)
 Miracle Method5.0 (4 reviews)
 AAA Southern States Refinishing4.0 (21 reviews)
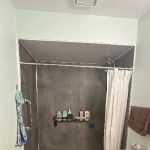 Shower & Bath Remodeling Pros5.0 (1 reviews)
 How to Refurbish a Cast Iron Skillet at Home: A Complete Guide
 Best Products for Cast Iron Restoration Service: Top Tools and Products
 Simple At-Home Techniques for Cast Iron Restoration | Restore Your Cookware
 How to Restore Cast Iron at Home | A Complete Guide for Beginners
 How Long Does Cast Iron Skillet Refinishing Take? Realistic Timeline for Restoration
 What to Avoid When Attempting Cast Iron Refinishing: Common Mistakes to Watch Out For