

- #cost-overview - Understanding the Cost of Refinishing a Bathtub With Epoxy Coatings
- #preparation-process - Preparing Your Bathtub for Epoxy Refinishing
- #application-steps - Step-by-Step Epoxy Coating Application
- #drying-curing - Drying and Curing Times for Optimal Results
- #maintenance-tips - Maintaining Your Newly Refinished Bathtub
- #diy-vs-professional - DIY vs Professional Bathtub Refinishing
- #common-mistakes - Common Mistakes and How to Avoid Them
- #real-world-experience - Real-World Case Studies From Cast Iron Restoration
- #final-thoughts - Ensuring Long-Term Satisfaction and Durability
Understanding the Cost of Refinishing a Bathtub With Epoxy Coatings
Refinishing a bathtub with epoxy coatings can be a cost-effective alternative to a full replacement, but it requires understanding several key cost factors. On average, professional refinishing services range from $300 to $700 for standard bathtubs, depending on the material, size, and condition of the tub. Cast iron and porcelain tubs, commonly found in older homes, tend to require more preparation and specialized coatings, which can increase the total cost.

America Refinishing Pros / america refinishing pros
9510 SW 137th Ave, Miami, FL 33186, USA
Factors influencing price
1. Tub material: Cast iron tubs require additional sanding and surface preparation compared to acrylic tubs.
2. Condition: Chips, cracks, or rust may necessitate repairs before coating application.
3. Coating quality: High-grade epoxy coatings offer longer durability but may be more expensive.
4. Labor: Professional refinishing ensures even coating and adherence, whereas DIY may reduce labor costs but increase risk of mistakes.

Surface Specialists of South Central MN / surface specialists mn
MankatoBlue Earth CountyMinnesota
436 Lyd Blvd, Mankato, MN 56001, USA
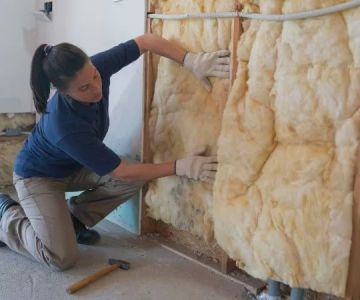
Preparing Your Bathtub for Epoxy Refinishing
Preparation is arguably the most critical part of the bathtub refinishing process. Proper surface preparation ensures the epoxy adheres correctly and results in a smooth, durable finish.
Cleaning and stripping
Before applying any epoxy, the tub surface must be thoroughly cleaned to remove soap scum, oils, and previous coatings. In some cases, old enamel or paint may need to be stripped using chemical strippers or sanding tools.
Sanding and repair
Next, the surface is sanded to create a slightly rough texture, promoting adhesion. Chips, cracks, or rust spots must be repaired with a compatible filler or epoxy patch to prevent future peeling or bubbling.
Masking and protection
All surrounding areas, including faucets, drains, and bathroom walls, are carefully masked with tape and plastic sheets. This step prevents accidental epoxy overspray and keeps the workspace clean.
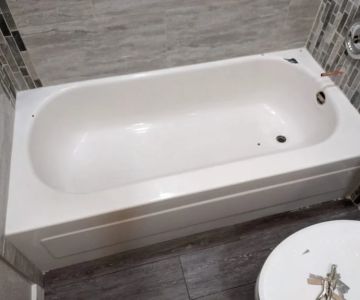
Step-by-Step Epoxy Coating Application
The application process of epoxy coatings requires attention to detail to achieve a smooth and durable finish. Many homeowners prefer professional services, but DIY kits are available for those confident in their skills.
Mixing the epoxy
Epoxy coatings typically come in two parts: the resin and the hardener. Mixing them in the correct ratio is critical. Incorrect ratios can result in a sticky or uneven finish.
Application techniques
1. Brush or roller: Ideal for smaller areas and edges, allowing precise coverage.
2. Spray gun: Provides a smoother, even coat over large surfaces but requires proper ventilation.
3. Multiple thin coats are better than a single thick layer to prevent runs, drips, or bubbles.
Edge and detail work
Corners, drains, and faucet areas require careful attention. Using small brushes and sponges ensures even coverage and prevents peeling over time.
Drying and Curing Times for Optimal Results
After application, epoxy coatings need adequate drying and curing time to achieve their full durability. Most coatings require 24–48 hours to dry to the touch, but full curing may take up to 72 hours or longer, depending on temperature and humidity.
Post-curing considerations
Avoid using the bathtub for showers or soaking during the curing period. Even minor water contact before full curing can affect adhesion and lead to bubbles or uneven texture.
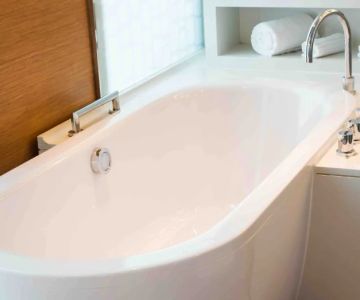
Maintaining Your Newly Refinished Bathtub
Proper maintenance extends the life of your epoxy-coated bathtub and keeps it looking like new. Mild cleaning solutions are recommended, avoiding harsh abrasives that can scratch or dull the finish.
Cleaning recommendations
Soft sponges and non-abrasive cleaners maintain the finish. Regular rinsing after use prevents soap scum buildup, which can discolor or weaken the epoxy layer.
Preventing damage
Avoid dropping heavy objects into the tub, as epoxy coatings are resistant but not indestructible. Additionally, avoid using drain cleaners that contain harsh chemicals, which can seep into small chips or cracks.
DIY vs Professional Bathtub Refinishing
Deciding between DIY and professional refinishing depends on your comfort level, budget, and desired finish quality. DIY kits offer savings but may result in uneven coating if proper preparation or application is not followed.
Professional advantages
Professionals bring experience, specialized tools, and high-quality coatings that last longer. Companies like Cast Iron Restoration can handle repairs, surface preparation, and coating application efficiently, ensuring consistent results.
DIY considerations
DIY projects require careful attention to safety, ventilation, and accurate mixing. Even with careful effort, results may vary, especially for cast iron or heavily damaged tubs.
Common Mistakes and How to Avoid Them
Many refinishing projects fail due to avoidable mistakes. Common issues include poor surface preparation, incorrect epoxy mixing ratios, and rushing the curing process.
Tips to avoid mistakes
1. Never skip sanding or repair steps.
2. Follow the manufacturer’s epoxy mixing instructions exactly.
3. Ensure proper ventilation and protective equipment during application.
4. Allow full curing before using the tub.
Real-World Case Studies From Cast Iron Restoration
At Cast Iron Restoration, we’ve observed a range of bathtub refinishing scenarios. For example, a 1920s cast iron bathtub with multiple rust spots was restored with a three-step epoxy process: thorough rust removal, epoxy patching, and two thin coats of high-grade epoxy. The result was a smooth, glossy surface that retained durability for years, demonstrating the value of professional expertise.
Client feedback and lessons
Clients report satisfaction not only with aesthetics but also with time and cost savings compared to full tub replacement. These case studies emphasize the importance of preparation, coating quality, and patience in achieving lasting results.
Ensuring Long-Term Satisfaction and Durability
Refinishing your bathtub with epoxy coatings is an effective way to rejuvenate your bathroom, improve aesthetics, and save money. Whether opting for professional services or a DIY approach, understanding the cost, preparation steps, and maintenance practices ensures long-term satisfaction.
For homeowners seeking reliable service and professional guidance, Cast Iron Restoration provides expertise in bathtub repairs, surface preparation, and durable epoxy coating applications. Following best practices and leveraging professional support allows you to enjoy a refreshed, long-lasting bathtub for years to come.


 Kings Collective Remodeling4.0 (45 reviews)
 Rome Bath Remodeling of Greenville5.0 (34 reviews)
 Empire Stone, Inc5.0 (43 reviews)
 Re-Bath4.0 (240 reviews)
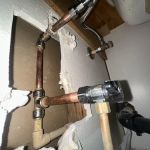 Plumbing Solution Specialist4.0 (246 reviews)
 Cal Stone Construction5.0 (19 reviews)
 How to Refurbish a Cast Iron Skillet at Home: A Complete Guide
 Best Products for Cast Iron Restoration Service: Top Tools and Products
 Simple At-Home Techniques for Cast Iron Restoration | Restore Your Cookware
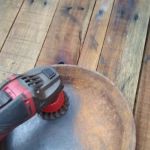 How to Restore Cast Iron at Home | A Complete Guide for Beginners
 How Long Does Cast Iron Skillet Refinishing Take? Realistic Timeline for Restoration
 What to Avoid When Attempting Cast Iron Refinishing: Common Mistakes to Watch Out For