
- 1-Understanding-Mold-Behind-Shower-Tiles
- 2-Key-Factors-That-Cause-Mold
- 3-Preventive-Strategies-After-Remodeling
- 4-Real-Life-Case-Studies
- 5-Professional-Tips-and-Recommendations
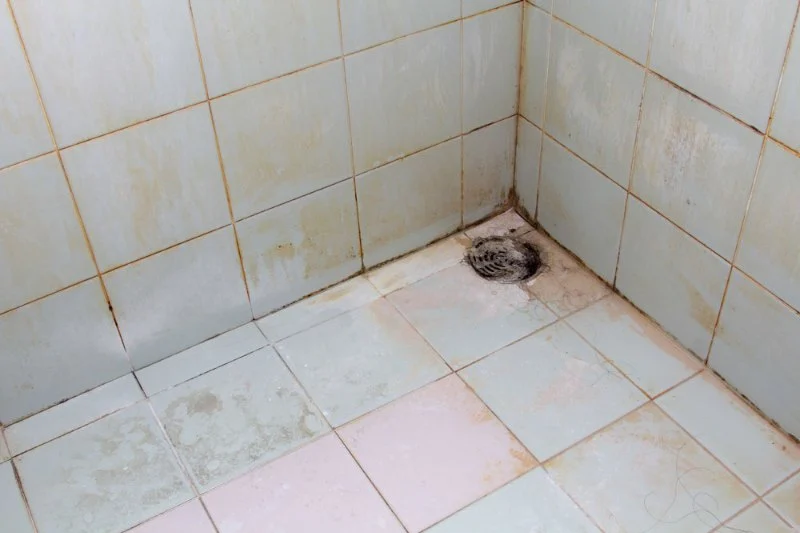
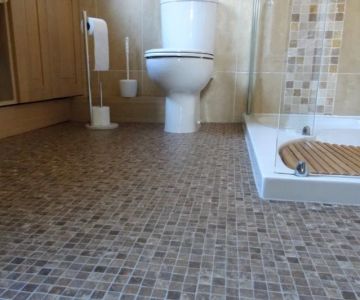
1. Understanding Mold Behind Shower Tiles
Mold growth behind shower tiles is a common problem in remodeled bathrooms. After a remodel, many homeowners notice discoloration, musty odors, or even structural issues caused by hidden moisture. Mold thrives in damp, poorly ventilated areas and can develop quickly if proper precautions are not taken.
When renovating a bathroom, especially when replacing tiles or repairing walls, it is crucial to address moisture management. Ignoring small leaks behind tiles or failing to use moisture-resistant materials often leads to long-term mold problems.

Surface Specialists of South Central MN / surface specialists mn
MankatoBlue Earth CountyMinnesota
436 Lyd Blvd, Mankato, MN 56001, USA
1.1 Why Mold Appears After Remodels
Even with a well-planned remodel, certain factors can unintentionally promote mold growth:
- Improper sealing of tiles and grout.
- Failure to install a proper vapor barrier.
- Hidden leaks from plumbing or shower fixtures.
- Poor ventilation and high humidity levels.
Understanding these causes helps homeowners take preventive steps immediately after construction or remodeling.
Miracle Method Surface Refinishing / miracle method boulder
Santa RosaSonoma CountyCalifornia
3200 Dutton Ave Suite #325, Santa Rosa, CA 95407, USA
2. Key Factors That Cause Mold
Preventing mold requires identifying the environmental and structural triggers that encourage its growth.
2.1 Moisture Accumulation
Bathrooms are naturally humid, but moisture trapped behind tiles is particularly dangerous. Tile adhesive or caulk that isn’t fully waterproof can allow water to seep into walls, creating the perfect environment for mold.
2.2 Inadequate Ventilation
Even after installing an exhaust fan, improper positioning or insufficient airflow can leave areas damp. Mold spores thrive in low-airflow zones, making ventilation planning a critical step in bathroom remodeling.
2.3 Material Selection
Using porous materials, such as certain drywall or grout types, can increase the risk of mold. Opting for water-resistant backer boards, epoxy grout, and moisture-resistant paint significantly reduces mold formation behind tiles.
3. Preventive Strategies After Remodeling
Once your shower tiles are installed, preventing mold requires both proactive installation techniques and ongoing maintenance.
3.1 Install a Vapor Barrier
A high-quality vapor barrier behind shower tiles is essential. This layer prevents water from penetrating walls and reaching areas where mold can grow unseen.
3.2 Use Mold-Resistant Materials
Choose mold-resistant drywall, backer boards, and grout. Epoxy grout, for example, is far less porous than standard cement grout and is easier to clean.
3.3 Ensure Proper Sealing
Apply waterproof caulking around joints, corners, and edges. Regularly inspect caulks for cracks or gaps, especially after heavy use or water exposure.
3.4 Optimize Bathroom Ventilation
Install high-capacity exhaust fans and consider dehumidifiers for bathrooms in humid climates. Even leaving the bathroom door slightly open after showers can reduce moisture buildup behind tiles.
3.5 Routine Maintenance and Inspection
Regularly check for signs of discoloration, soft spots behind tiles, or musty odors. Early detection prevents minor issues from becoming extensive mold problems.
4. Real-Life Case Studies
Consider a homeowner in Chicago who remodeled their bathroom using standard drywall and cement grout. Within six months, mold appeared behind the shower tiles due to insufficient ventilation. After switching to mold-resistant backer boards and epoxy grout while adding a vapor barrier, the problem was fully resolved, demonstrating the effectiveness of proper materials and installation techniques.
Another example comes from a New York City apartment where a small leak behind a tiled shower went unnoticed for months. The mold infestation required professional remediation, highlighting the importance of ongoing inspection and immediate action on water leaks.
5. Professional Tips and Recommendations
Experts recommend several steps to prevent mold effectively after a remodel:
5.1 Invest in Quality Materials
High-quality, mold-resistant materials may have higher upfront costs but save homeowners money in long-term mold remediation. Sites like Cast Iron Restoration provide a range of products and services that meet these standards, ensuring safer bathroom environments.
5.2 Hire Skilled Contractors
Proper installation is just as important as material choice. Experienced contractors ensure vapor barriers, sealing, and ventilation are correctly implemented.
5.3 Educate Yourself About Mold Risks
Understanding mold biology and recognizing early signs of moisture intrusion empowers homeowners to act quickly and prevent serious damage. Combine preventive measures with vigilance to maintain a healthy bathroom environment.
By following these strategies, homeowners can enjoy beautifully remodeled bathrooms without the hidden hazard of mold behind shower tiles.


 Surface Bella4.0 (143 reviews)
 BNH Home Services LLC5.0 (99 reviews)
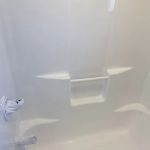 NuFinishPro of Sacramento5.0 (36 reviews)
 ProCraft Cabinetry4.0 (103 reviews)
 Bathtub Reglazing NY5.0 (1 reviews)
 Brighton Bathroom5.0 (36 reviews)
 How to Refurbish a Cast Iron Skillet at Home: A Complete Guide
 Best Products for Cast Iron Restoration Service: Top Tools and Products
 Simple At-Home Techniques for Cast Iron Restoration | Restore Your Cookware
 How to Restore Cast Iron at Home | A Complete Guide for Beginners
 How Long Does Cast Iron Skillet Refinishing Take? Realistic Timeline for Restoration
 What to Avoid When Attempting Cast Iron Refinishing: Common Mistakes to Watch Out For