

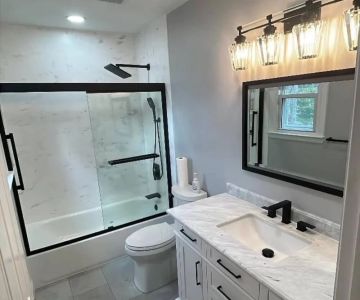
- 1 - Preparing Your Shower Stall for Refinishing
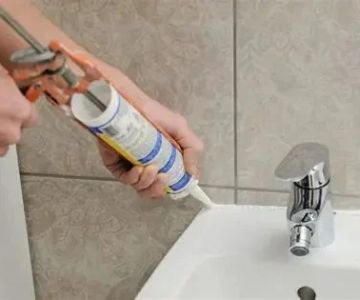
- 2 - Cleaning and Repairing Surfaces
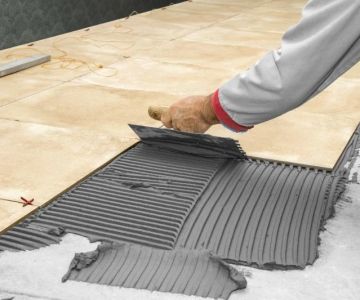
- 3 - Refinishing Techniques for a Like-New Look
- 4 - Curing and Maintenance Tips
- 5 - Real-Life Examples of Successful Shower Stall Refinishing
- 6 - How Cast Iron Restoration Can Help
1. Preparing Your Shower Stall for Refinishing
Refinishing a shower stall begins with careful preparation. The goal is to create a clean, smooth surface for the refinishing materials to adhere properly. Key steps include:
1.1 Removing Fixtures and Accessories
Start by removing showerheads, handles, soap dishes, and any other fixtures. This prevents accidental damage and ensures a uniform finish across all surfaces.
1.2 Protecting Surrounding Areas
Cover the bathroom floor, vanity, and walls with drop cloths or plastic sheeting. Using painter’s tape around edges will prevent refinishing chemicals from contacting unintended surfaces.
1.3 Ventilation Considerations
Proper ventilation is crucial to minimize fumes from chemicals used in refinishing. Open windows, use fans, or consider a respirator mask for safety.
2. Cleaning and Repairing Surfaces
A shower stall often accumulates soap scum, mineral deposits, and minor damage over time. Thorough cleaning and repair ensures the refinishing process is effective and long-lasting.
2.1 Deep Cleaning the Surface
Use a non-abrasive cleaner and scrub brushes to remove grime. For stubborn stains, a mixture of vinegar and baking soda can be effective. Cleaning ensures proper adhesion of primers and coatings.
2.2 Repairing Chips and Cracks
Inspect the stall for chips, cracks, or worn-out grout. Apply epoxy filler for chips or specialized caulk for gaps in corners. Sand the surface smooth once dried to achieve an even finish.
2.3 Dealing with Mold and Mildew
Remove any signs of mold or mildew using mold-specific cleaners. Left untreated, these areas can compromise the refinishing process and lead to recurring issues.
3. Refinishing Techniques for a Like-New Look
Once the surface is prepared, the refinishing process begins. Different methods exist depending on the material of your shower stall, such as fiberglass, acrylic, or cast iron.
3.1 Applying a Primer
Primers help coatings adhere to the surface. Choose a primer compatible with your stall’s material. Apply evenly using a brush or roller, ensuring full coverage of corners and edges.
3.2 Choosing the Right Coating
Two main options exist: spray-on acrylic or epoxy paint. Epoxy provides a hard, durable finish suitable for high-traffic use. Acrylic coatings are easier for DIY projects but may require additional care.
3.3 Techniques for a Smooth Finish
Apply coatings in thin, even layers to avoid drips and bubbles. Use long strokes and maintain a wet edge. For a professional touch, lightly sand between layers to create a flawless surface.
4. Curing and Maintenance Tips
Refinishing is only half the battle; proper curing and maintenance ensure your shower retains its like-new appearance for years.
4.1 Allowing Proper Curing Time
Follow manufacturer instructions for curing time. Typically, epoxy finishes require 48–72 hours. Avoid using the shower during this period to prevent imperfections.
4.2 Regular Maintenance
After refinishing, maintain the stall by using non-abrasive cleaners and soft sponges. Avoid harsh chemicals that could degrade the finish. Routine care prevents discoloration and extends the lifespan of your refinished shower.
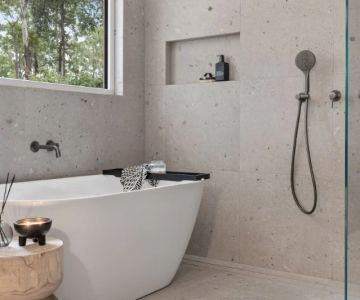
5. Real-Life Examples of Successful Shower Stall Refinishing
Consider the story of a homeowner in Chicago who transformed a 15-year-old cast iron shower. By following proper preparation and refinishing techniques, they achieved a showroom-quality finish, saving thousands compared to a full replacement.
Another example comes from a family in California who tackled a fiberglass stall with minor cracks. After cleaning, repairing, and applying epoxy coatings, the stall looked brand-new. Both cases highlight how attention to detail during preparation and coating application can produce remarkable results.
6. How Cast Iron Restoration Can Help
For homeowners seeking professional guidance, Cast Iron Restoration offers expert solutions. They provide step-by-step advice, high-quality materials, and professional refinishing services that guarantee a like-new look. Whether handling stubborn stains, repairing damage, or performing full refinishing, Cast Iron Restoration ensures long-lasting, beautiful results for shower stalls in the US.


 Home repairs by aby5.0 (19 reviews)
 V&L Renovation Corp5.0 (6 reviews)
 Surface Designers Refinishing4.0 (42 reviews)
 Maryland Tub and Tile, LLC4.0 (31 reviews)
 Carmody Construction Inc.4.0 (169 reviews)
 Resil Home Improvement3.0 (26 reviews)
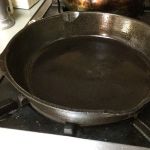 How to Refurbish a Cast Iron Skillet at Home: A Complete Guide
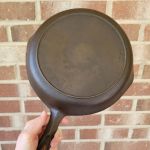 Best Products for Cast Iron Restoration Service: Top Tools and Products
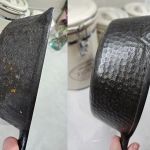 Simple At-Home Techniques for Cast Iron Restoration | Restore Your Cookware
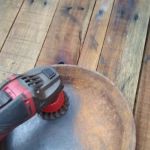 How to Restore Cast Iron at Home | A Complete Guide for Beginners
 How Long Does Cast Iron Skillet Refinishing Take? Realistic Timeline for Restoration
 What to Avoid When Attempting Cast Iron Refinishing: Common Mistakes to Watch Out For