
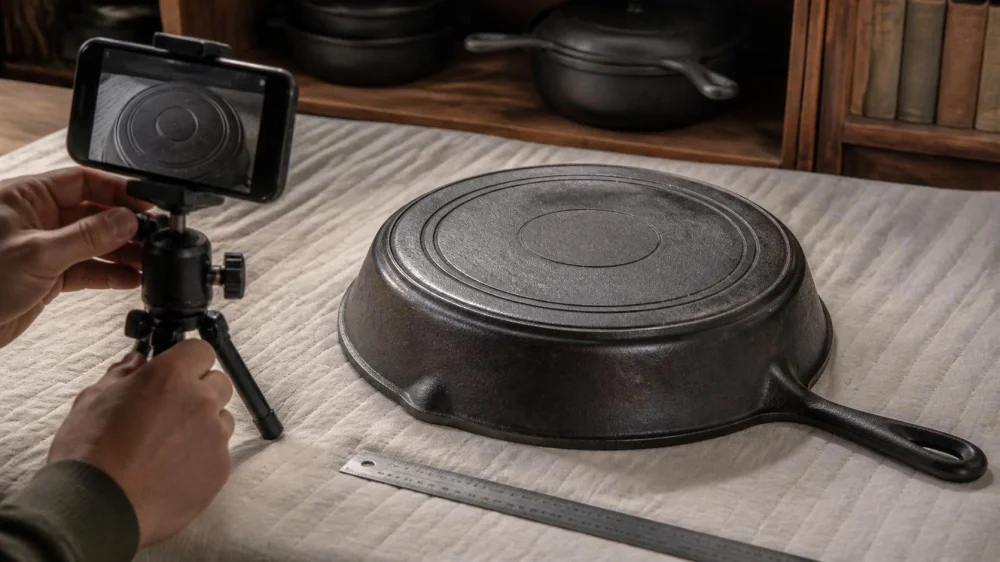
Cast Iron Maker Marks: Document Before Restoration
On this page
Quick answer
Photograph every cast, stamped, or incised mark before cleaning vintage cast iron. Capture the full piece, underside, handle, heat ring, spouts, lid, and close-ups under angled light, then record dimensions and condition. Maker names, pattern numbers, size marks, mold marks, and design features are clues, but no single mark should establish age, rarity, value, or food safety.
This guide is for United States owners, collectors, and restorers documenting cast iron cookware before restoration. It helps preserve identification evidence. It is not an appraisal, an authentication, a manufacturer timeline, or proof that an unknown vintage item is safe to use for cooking.
Fort Worth Refinishing / fort worth bathtub refinishing
2627 S Cooper St Suite E12, Arlington, TX 76015, USA
Why documentation comes first
Cast iron maker marks are letters, numbers, symbols, logos, size indicators, pattern references, or production marks formed or added to a piece. They may appear on the underside, handle, lid, bail attachment, rim, or another casting surface.
Restoration can reveal faint marks by removing rust and buildup, but aggressive work can also soften edges, erase shallow details, change texture, or remove evidence about the item’s condition. A before-restoration record preserves what was visible at acquisition and allows later comparison.
Documentation is useful because:
- faint marks may photograph better before the surface changes;
- condition photos show where rust, residue, cracks, pitting, or repairs existed;
- measurements help distinguish pieces with similar logos;
- lids and accessories can become separated during cleaning;
- restoration quotes are easier to compare with a shared baseline; and
- future owners can see which features are original and which changed.
A mark is one part of an identification. Casting shape, handle geometry, spouts, heat ring, wall profile, lid fit, surface texture, and documented provenance may be equally important.

Miracle Method Surface Refinishing / miracle tub refinishing
Santa RosaSonoma CountyCalifornia
3200 Dutton Ave Suite #325, Santa Rosa, CA 95407, USA
A practical photo workflow
- Handle the piece safely. Work on a strong, padded, stable table. Cast iron is heavy and brittle. Wear gloves for sharp rust, but keep gloved fingers away from marks in photos.
- Assign an item ID. Use a paper card placed beside the cookware, not tape or marker on the iron. Photograph the card in the first frame, then remove it for detail images.
- Take orientation views. Photograph the cooking surface, underside, both side profiles, handle top and bottom, spouts, rim, and any lid or accessory.
- Use indirect light first. Soft overhead light records overall condition without deep shadows. Keep the camera square to the surface to reduce distortion.
- Add raking light. Shine a movable light across the surface at a low angle. Shadows can reveal shallow letters, ghost marks, raised edges, grinding, and casting texture.
- Change the light direction. Photograph the same faint feature with light from several sides. A shape hidden in one direction may become legible in another.
- Add scale. Place a clean ruler beside the feature on the same plane. Do not cover the mark, scratch the surface, or imply precision beyond what the photo supports.
- Stabilize the camera. Use a tripod, stand, or supported phone. Tap to focus on the mark, avoid digital zoom when possible, and review sharpness before moving the piece.
- Keep original files. Save full-resolution images with metadata. Make edited copies for contrast or cropping instead of replacing the originals.
Do not use chalk, flour, graphite, oil, paint, acid, or household chemicals to “bring out” a mark without understanding how the material could alter the surface or contaminate cookware. Light and camera position should be the first tools.
Details beyond the main logo
Create a short condition and feature sheet for each piece:
- overall diameter measured at the rim and height on a level surface;
- handle length, opening shape, reinforcement rib, and hanging hole;
- number, shape, and symmetry of pour spouts;
- presence, shape, and interruptions of a heat ring;
- raised, incised, or stamped letters, numbers, dots, bars, or symbols;
- location and orientation of each mark relative to the handle;
- lid markings, drip features, handle type, and fit;
- casting seams, gate marks, grinding, polished surfaces, and texture;
- rust, pitting, carbon buildup, cracks, warping, welds, and other repairs; and
- provenance such as seller, location, receipt, family history, and acquisition date.
Transcribe only what you can see. Use brackets or a question mark for uncertain characters rather than forcing them into a familiar maker name. For example, record “raised mark, possibly 8 or 3” and retain the supporting photos.
Keep lids and cookware linked with their item IDs until fit and origin are evaluated. A lid that fits physically is not necessarily the original matching lid. Record both pieces separately before treating them as a set.
How to research an identification
- Start with objective features. Search the exact visible wording or number together with item type, handle shape, heat ring, or lid detail.
- Compare multiple examples. Look for consistent combinations, not just one similar logo. Reproductions, recasts, altered pieces, and incorrect listings circulate online.
- Prefer traceable sources. Manufacturer catalogs, patents, advertisements, trade publications, museum collections, collector references with cited evidence, and archived company records are stronger than an unsupported marketplace title.
- Separate identification from date. A maker used marks across ranges of time, and molds or designs could change. Confirm that the mark style and construction details support any date claim.
- Separate rarity from price. Asking prices do not establish sales value. Condition, size, region, matching parts, restoration, provenance, and current demand all matter.
- Ask a specialist with a complete packet. Provide all views, measurements, condition notes, and provenance rather than one cropped logo photo.
- Record confidence. Label the result as confirmed, probable, possible, or unidentified and note which evidence would change the conclusion.
A confident answer should explain why the mark and physical design fit together. If a logo suggests one maker but handle, heat ring, or casting style conflicts, preserve the uncertainty.
Use the record to plan restoration
Choose minimal intervention when the piece may have collectible significance, marks are shallow, surface history matters, or the intended use is display. Cleaning for legibility is not always worth removing original finish or texture.
Consider a cooking restoration only after confirming the item is cookware, structurally sound, free of unknown coatings or repairs, and suitable for food contact. Identification and cooking safety are separate decisions. A recognizable maker name does not certify a specific used pan.
Seek professional restoration for valuable, rare, fragile, badly rusted, deeply pitted, repaired, or uncertain pieces. Share the before photos and ask which methods will be used, what material may be removed, how markings will be protected, and what the expected finish is.
Stop destructive work if a previously hidden crack, weld, braze, hole, soft metal fill, unknown paint, or chemical odor appears. Document the finding before deciding whether the item remains decorative, collectible, or suitable for further evaluation.
After restoration, repeat the same photo sequence, lighting angles, measurements, and condition notes. A before-and-after pair is more useful than a beauty photo because it shows exactly what the process revealed or changed.
Evidence and limitations
This guide follows common collection and conservation practice: document an object before intervention, preserve original files, separate observation from interpretation, and use several independent features for attribution. It intentionally avoids maker-specific dates and values because those require case-specific sources.
Photos can hide depth, curvature, repairs, and surface differences. Lighting and image processing may create apparent lines that are not physical marks. Final identification, appraisal, and food-use decisions may require in-person examination and appropriate testing.
Frequently asked questions
Where are maker marks usually found on cast iron?
The underside is common, but marks can also appear on handles, lids, rims, bail attachments, and other casting areas. Photograph the entire piece so a less obvious mark is not missed.
What is a ghost mark?
Collectors use the term for a faint remnant or outline of an earlier mark associated with a mold or pattern history. Interpretation requires care because wear, buildup, casting texture, and lighting can resemble intentional marks.
Does a number tell me the pan’s diameter?
Not reliably. A number may relate to a historic size system, pattern, mold, stove opening, or another production reference. Measure the actual piece and research the mark in context.
Should I remove rust before photographing a mark?
Photograph first. If later cleaning is justified, document each stage and use a method appropriate to the piece. The before images preserve evidence that cleaning may alter.
Can an online photo identify the exact age?
Sometimes a well-documented feature narrows a range, but an exact year is often unsupported. Ask what primary or traceable evidence connects the specific mark and design to the claimed date.
Does identifying the maker prove the pan is safe to cook in?
No. Food-use suitability also depends on cracks, repairs, coatings, contamination, corrosion, and the item’s history. Treat identification and cookware-safety evaluation as separate steps.
Next steps
Give the piece an item ID, photograph every surface under soft and angled light, add scale, and record dimensions, construction details, condition, and provenance. Save original files before any cleaning. Research the full feature combination through traceable sources, label uncertainty honestly, and use the record to choose minimal cleaning, professional restoration, or no intervention.


 The Shower Company4.0 (18 reviews)
 Superior Resurfacing4.0 (7 reviews)
 Miracle Method Surface Refinishing4.0 (46 reviews)
 Dramatix Decor5.0 (17 reviews)
 DB Bathroom Remodeling Contractors5.0 (48 reviews)
 Olive Tree Construction5.0 (3 reviews)
 How to Refurbish a Cast Iron Skillet at Home: A Complete Guide
 Best Products for Cast Iron Restoration Service: Top Tools and Products
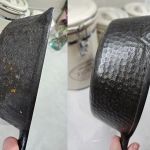 Simple At-Home Techniques for Cast Iron Restoration | Restore Your Cookware
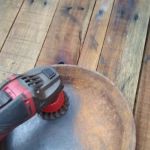 How to Restore Cast Iron at Home | A Complete Guide for Beginners
 How Long Does Cast Iron Skillet Refinishing Take? Realistic Timeline for Restoration
 What to Avoid When Attempting Cast Iron Refinishing: Common Mistakes to Watch Out For