
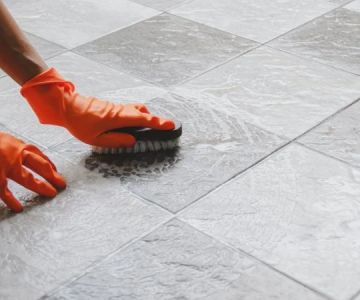
- 1. Preparation Is Key for Smooth Refinishing
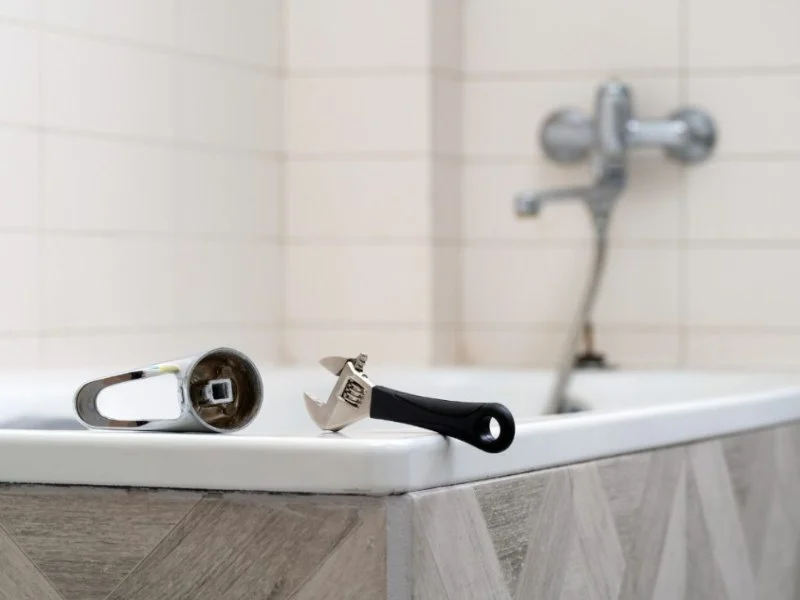
- 2. Choosing the Right Tools for the Job
- 3. Steps to Achieve Smooth and Even Refinishing Lines
- 4. Common Mistakes to Avoid During Refinishing
- 5. Real-Life Example: A Successful Refinishing Project
- 6. Recommended Resources from Cast Iron Restoration
1. Preparation Is Key for Smooth Refinishing
The first step in ensuring your refinishing lines are smooth and even is preparation. Just like with any project, proper planning and groundwork can make all the difference in the outcome. If you skip the preparation, even the best tools won’t yield the results you want.
Before you begin refinishing any surface, make sure it is clean and free of any dust, dirt, or grease. This is especially important when refinishing surfaces like cast iron or wood, where buildup can cause uneven coats or lumps in the finish. Use a degreaser or a cleaner that is appropriate for the material you're refinishing. Once cleaned, allow the surface to dry completely before moving on to the next steps.
Additionally, if you're refinishing a surface that has old paint or varnish, sanding or stripping it off before starting will ensure better adhesion of the new finish, resulting in a smoother and more even application.
2. Choosing the Right Tools for the Job
To achieve smooth and even refinishing lines, selecting the right tools is critical. The tools you use will determine the quality and consistency of your refinishing work. Here are some tips on what tools to choose:
Brushes and Rollers
When refinishing, the choice of brush or roller plays a huge role in the final appearance. Use high-quality brushes designed for the specific finish you’re applying, whether it's oil-based or water-based paint. A brush with synthetic bristles works well for water-based finishes, while natural bristles are better for oil-based finishes. The same goes for rollers—make sure you select the correct nap size to avoid streaking.
Sanding Equipment
Sanding is one of the most important steps in refinishing, especially if you're working with rough or uneven surfaces. Use a sanding block, orbital sander, or sandpaper to smooth the surface before applying any new coats. For the best results, start with a coarse grit to remove imperfections and work your way to finer grits for a smooth, flawless finish.
Spray Guns (Optional)
If you're working on larger surfaces or want to achieve a very smooth and even coat, consider using a spray gun. Spray guns give a professional finish without streaks or lines that may result from using brushes or rollers. However, using a spray gun requires skill and practice, so be sure to practice beforehand.
3. Steps to Achieve Smooth and Even Refinishing Lines
Once you've prepared your surface and selected your tools, it's time to apply the finish. Follow these steps to ensure smooth, even lines in your refinishing project:
Step 1: Apply Thin Layers
One of the biggest mistakes people make when refinishing is applying too much product at once. Instead, apply several thin layers, allowing each coat to dry fully before applying the next one. This helps prevent drips, streaks, and uneven lines.
Step 2: Work in Long, Even Strokes
For smooth lines, work in long, even strokes. When using a brush, avoid overloading the brush with product, as this can create streaks or brush marks. Always start at the edge of the surface and work your way across in a continuous motion, maintaining consistent pressure.
Step 3: Sand Between Coats
To ensure each layer adheres properly and remains smooth, sand the surface lightly between coats. Use fine-grit sandpaper and sand the surface gently to remove any bumps or rough spots. This also helps the next layer of finish adhere better, ensuring an even surface.
Step 4: Finish with a Final Polishing
Once you've applied the final coat of finish, allow it to dry completely before gently polishing the surface. This step will remove any small imperfections and leave your refinished surface with a smooth, glossy look. For best results, use a soft cloth or a buffing pad designed for your specific material.
4. Common Mistakes to Avoid During Refinishing
While refinishing, there are a few common mistakes that can ruin your smooth, even lines. Here are some to watch out for:
- Using Too Much Product: Applying too much product can lead to drips, uneven lines, and an inconsistent finish. Always apply thin layers and allow time for drying between coats.
- Skipping Sanding Between Coats: Not sanding between coats can cause rough patches, poor adhesion, and a blotchy finish. Sanding creates a smoother surface for the next coat to bond with.
- Incorrect Tools: Using the wrong type of brush, roller, or sander for the material and type of finish can lead to streaks and uneven texture. Always choose tools based on the job at hand.
- Rushing the Process: Refinishing takes time. Rushing through steps can cause mistakes and leave you with a less-than-perfect result. Allow each coat to dry fully and take your time with each application.
5. Real-Life Example: A Successful Refinishing Project
One of my most successful refinishing projects involved restoring a cast iron bathtub that had seen better days. It had deep scratches and an uneven coating of old paint. By following the steps outlined above, I was able to achieve a flawless finish.
After cleaning, stripping, and sanding the surface, I applied thin layers of high-quality enamel paint. Each layer was carefully sanded, and by the time I reached the final coat, the tub had a smooth, shiny surface that looked brand new. This project not only restored the tub but also demonstrated the power of patience and proper technique in achieving a professional look.
6. Recommended Resources from Cast Iron Restoration
If you're looking to start your own refinishing project, Cast Iron Restoration offers a range of tools, paints, and resources designed specifically for restoring cast iron and other surfaces. Our products are chosen for their high quality and ability to provide a smooth, even finish on any project.
Visit Cast Iron Restoration to discover the best materials and expert advice for achieving a professional refinishing look.


 Art&Creation Kitchen & Bath Remodeling5.0 (19 reviews)
 JBCK Custom Homes Builders5.0 (4 reviews)
 N-Hance of Palm Beach & Martin County4.0 (192 reviews)
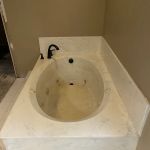 Bathtub Reglazing LLC0.0 (0 reviews)
 Flourish Interiors5.0 (19 reviews)
 Kitchen Solvers of Grayslake5.0 (38 reviews)
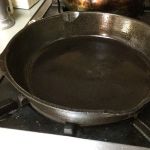 How to Refurbish a Cast Iron Skillet at Home: A Complete Guide
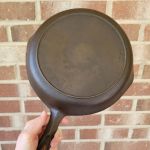 Best Products for Cast Iron Restoration Service: Top Tools and Products
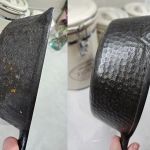 Simple At-Home Techniques for Cast Iron Restoration | Restore Your Cookware
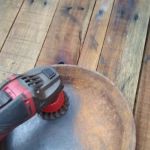 How to Restore Cast Iron at Home | A Complete Guide for Beginners
 How Long Does Cast Iron Skillet Refinishing Take? Realistic Timeline for Restoration
 What to Avoid When Attempting Cast Iron Refinishing: Common Mistakes to Watch Out For